- When to go for Mac Internet Recovery for MAC OS X
- How to Reinstall MAC OS X with Internet Recovery Mode
- What to do when Mac Internet Recovery Method Fails
- Video tutorial of Mac Internet Recovery
While there are many methods available to the users to recover or reinstall their MAC OS X, in this article, we shall keep our focus on the re-installation that is carried out through the Internet Recovery mode. Critical data can be lost if the OS isn’t recovered, and to overcome that issue, it is important to learn about the re-installation process of MAC OS X through the Internet Recovery mode. While users are free to make their choice when it comes to opting for a method, the Internet Recovery mode certainly surpasses many others, and in the following article, we shall understand why.

Part 1 When to go for Mac Internet Recovery for MAC OS X
We shall answer the above question by classifying it into a series of sub-questions. To start with, let us understand what Mac Internet Recovery is.
What is Mac Internet Recovery?
The recent models of MACs come with the functionality of starting up directly from an Internet-based version of the Mac OS X Recovery. This is particularly helpful in the case where the startup drive encounters an issue, or worse, is missing the OS altogether. The erase or wiping can happen accidentally or due to some software bug and can cause disruption to the user. Through Mac Internet Recovery, users have the option to start their MAC directly through the Apple Servers. When the users use this mode to start their systems, the system performs quick storage space test along with checking the hard disk for any other hardware bugs.
Why should you use Internet Recovery to reinstall MAC?
Well, this one of the most frequently asked question amongst the ones operating MAC Systems. Why take all the trouble and opt for Internet Recovery instead of going the conventional way? In the following points, we list the reasons that make reinstallation of MAC through Internet Recovery an intelligent option.
- One doesn’t need an Operating System disc in order to perform the reinstallation. This is helpful in cases when you are not carrying the OS disc and want to perform the reinstallation immediately to carry on with your work.
- There is no need for the user to download separate Operating System files. The Internet Recovery mode will download the installer files, and as a user, you are saved from the trouble of downloading them yourself.
- The method is less complicated than the conventional method of downloading and installing the MAC OS X. This is helpful for users who aren’t very keen on the technical aspects of the installation process.

What should I do before opting for Internet Recovery?
Here are the points that must be kept in mind before going for reinstallation of MAC through Internet Recovery mode:
- For obvious reasons, you must have an internet connection. Users must use their DHCP on the WiFi or any Ethernet Network in order to install the MAC OS X.
- For the ones who have purchased the OS X from any Apple Store, they might be prompted to enter an Apple ID or password that was used to purchase the OS X.
- Users must note that the time taken for the reinstallation of OS X directly depends on the speed of the internet connection being used. Please ensure that the Internet settings are compatible with the Mac OS X Recovery. In case of incompatible settings, the installation process could be halted midway.
Part 2 How to Reinstall MAC OS X with Internet Recovery Mode
Here are the steps that are to be taken. We start with accessing the recovery mode on your MAC through the following steps:
1) Access recovery mode by holding down the Apple Key and R Key.

2) Users must ensure that they are connected to the internet. We recommend that you use a private network for the same, and avoid any public network due to its configuration. Also the installation file happens to be large which may take quite a lot of time on any public network.

3) Now, power off your MAC; Apple Shut Down. If you experience the OS not responding, simply press and hold the power button until the MAC switches itself off, and then wait for 30 seconds.

4) Power on your MAC. Hold the Apple Key and R key until you hear the chime noise. Once heard, it will start the OS X in Recovery Mode.

5) The final step has you tapping the ‘Install MAC OS X’ and Continue in the OS X utilities section of the screen in order to start the installation process. After that, there would be on-screen instructions to guide you through the entire process.

Part 3 What to do when Mac Internet Recovery Method Fails
It is possible that you might not be able to reinstall your MAC OS X successfully using the Internet Recovery Mode. While this can be a damper, it doesn’t really mean you cannot diagnose the problem behind it.
Why could have the Internet Recovery method failed?
- Check that your internet connection is working. The Ethernet users must check for proper cable connections while the WiFi users must check the modem.
- If you are on a public network, chances are that the internet settings might not be compatible with the installation process.
- If the internet is too slow, the process could have abandoned itself as the file to be downloaded is quite large.
- Please check that your MAC has proper power connection. In case of laptops, the battery should be enough. Losing your power midway can render your device useless.
Measures to be taken to ensure that the Internet Recovery Mode works:
- As discussed above, we recommend that you opt for a private internet network to carry out the above process. This is because of the large size of the installation file and the hindrances you wish to avoid due to incompatible internet settings and slow internet speed.
- Please ensure that there is sufficient in your system. Losing power in the process can render the device useless.
- If the problem persists even when the above two measures have been taken, chances are that your hard disk has been corrupted completely, and therefore, consult a technical consultant for the same.
What if I lose critical data in the process?
For the ones who have lost critical data in the process, there is the option of using Wondershare Data Recovery for MAC. It can be downloaded from the company’s website and is helpful to both, Windows and MAC users. We highlight its working in the following steps:

- Recover lost or deleted files, photos, audio, music, emails from any storage device effectively, safely and completely.
- Supports data recovery from recycle bin, hard drive, memory card, flash drive, digital camera and camcorders.
- Supports to recover data for sudden deletion, formatting, hard drive corruption, virus attack, system crash under different situations.
- Preview before recovery allows you to make a selective recovery.
- Supported OS: Windows 10/8/7/XP/Vista, Mac OS X (Mac OS X 10.6, 10.7 and 10.8, 10.9, 10.10 Yosemite, 10.10, 10.11 El Capitan, 10.12 Sierra) on iMac, MacBook, Mac Pro etc.
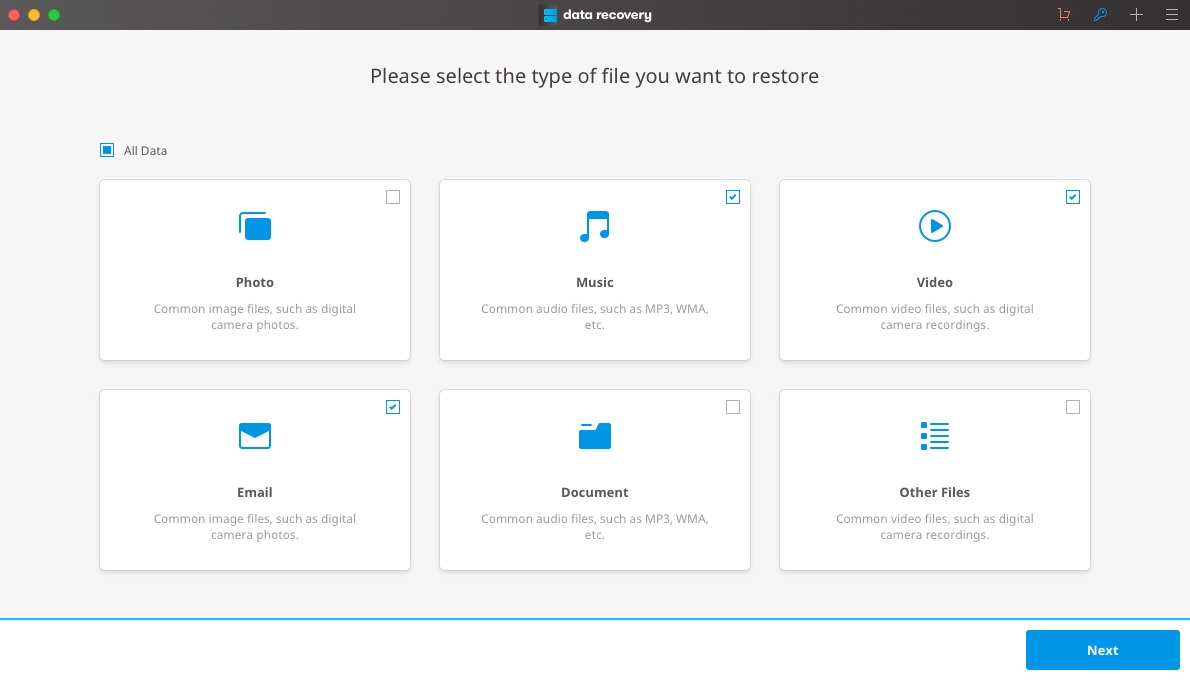
Step 1. Download Wondershare Data Recovery on your Mac and launch it. Select the typs of files you want to recover, click "All File Types" to start.

Step 2. The interface will now help you view all the partitions and other external storage devices that are connected to your MAC. Select the data that you lost and tap "Start" to start searching for files.

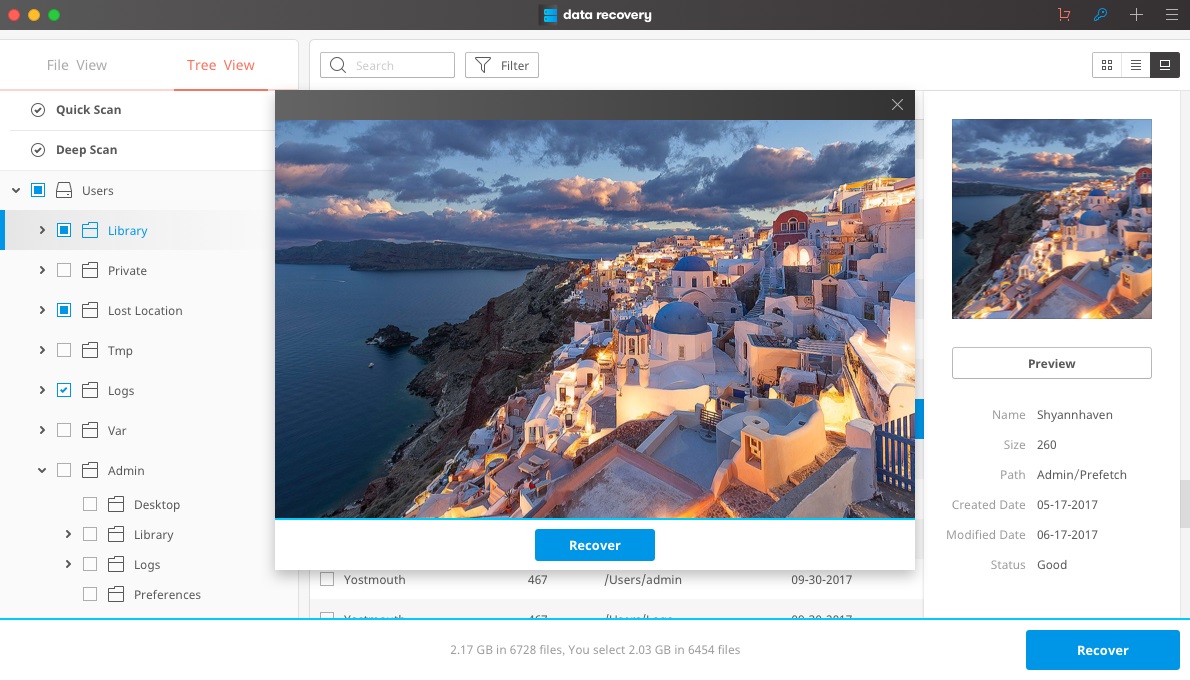
Step 3. Once the scan is finished, the lost contents would be displayed, and the users can select their lost content and tap on "Recover" to restore them to their MAC. However, users must be careful not to save the recovered data in its original location due to the risk of being overwritten.

The above information is helpful for anyone who is looking to reinstall their MAC OS X through the Internet Recovery mode. Please note that the Recovery Mode in Apple offers numerous functions to the users and therefore is a great tool to learn more about.
Ștergerea / Undelete fișiere
- -
- Fișiere șterse II +
- Undelete Fișiere I +
- Undelete Files II+
-
- EaseUs Deleted Files Recovery alternatives
- Recover shift deleted files
- Undo accidental delete
- Retrieve deleted contacts
- Mac undelete
- Recover deleted folders
- Android Apps to recover deleted files
- System restore deleted files
- Recover deleted files from Android
- Recover deleted photos
- Recover deleted files from recycle bin
- Recover deleted partition
- Recover Dropbox deleted files


