Advancements in technology have left us baffled with the changes it has brought. SD card is another wonder of the tech world. It can increase the memory of mobile, camera, and tab devices to 100 folds. Sometimes, however, such a large memory on a device can be hard to handle. This tutorial will show you how to partition a memory card for easier access to the user.
1. Purpose of Partitioning an Android SD Card
Among many of the useful reason, two stand out considerable; increased speed of the device and easier access for the user.
-
Increased speed
By splitting the SD card into two or more drives, the load on it lessens. When there is less load on the device to open a particular file, it will provide the user with the best downloading and processing speed.
-
Easy access
Once the device has been partitioned, finding files will be easier as their will be less clutter to delay the process. The SD card without partition will open with a delay but when it comes to partitioned SD card it will open with far much greater speed as compared to normal.
Part 1 Partitioning Android SD card
The process to partition Android SD Card is very simple. The user needs to make sure that the stated steps are followed to successfully partition their device.
- 1. Click one this http://minitool-partition-wizard-home-edition.soft112.com/ to download a software that will partition the SD card. Once it is installed, it will provide two versions of this tool; free and paid. For this process, it is recommended to use the free version as it has all the functions needed to complete the process.
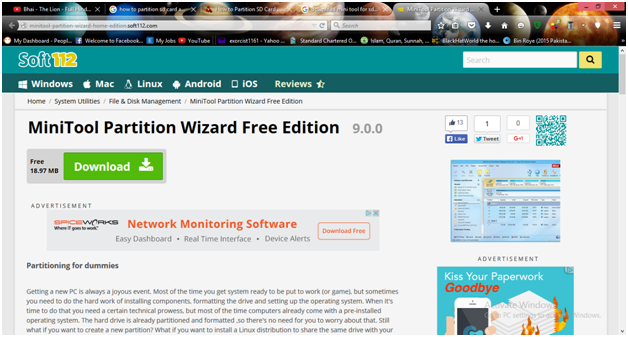
- Users should backup all the data on the SD card as a precaution before the partitioning process. Users need to make sure that the SD is inserted into the card reader and the reader is inserted into the USB port. The mini tool will automatically recognize the SD card.
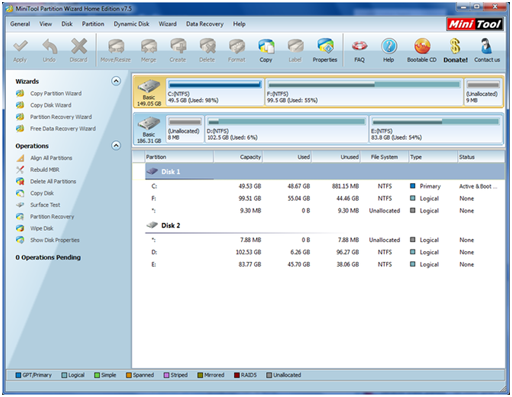
- To start the partition, delete the entire SD card after right-clicking on it.
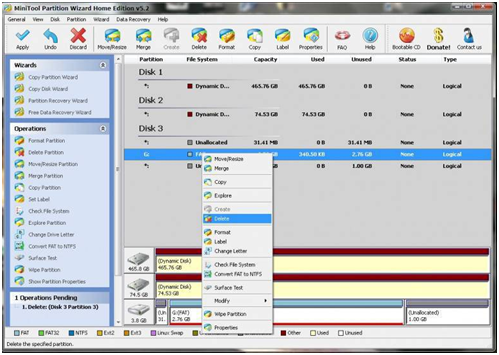
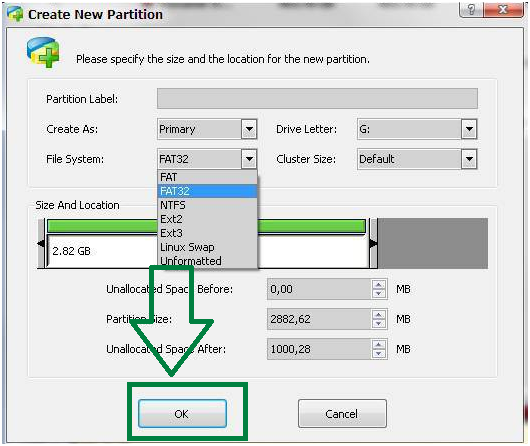
- Right click on it again to partition Android SD card, use FAT 32 system to start the partition of the card. It should also be noted that the new partition should be set up as a primary. The number of partitions, as well as the sizes should be allocated, as has been shown in the figure below:
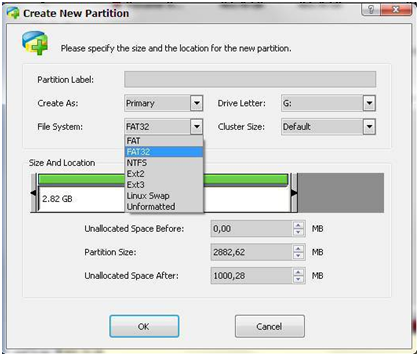
- Press the ‘OK’ button to ensure that the process is completed. Take out the SD card and insert in the phone. Switch on the phone when it is inserted.
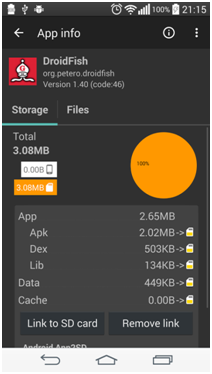
- Users then need to download an app called Link2SD from this https://play.google.com/store/apps/details?id=com.buak.Link2SD on their phone which has the SD card.
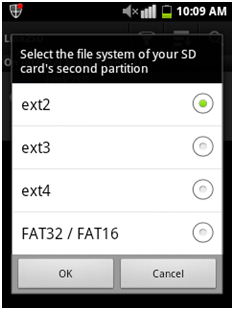
- The user will be prompted to select between ext 2, ext 3, ext4, and FAT 32. Users should select ext 2 and reboot their phone after they have tapped the ‘OK’ button.
- Select the options that have been in the figure below and tap the ‘ok’ button.
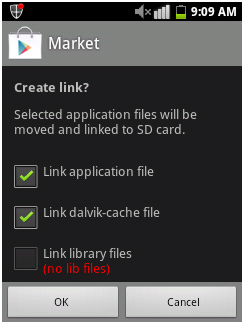
- This will move the app to the SD card upon installation. It will also make sure that the system related apps such as Facebook and Whatsapp are also transferred to the SD card without any issue or problem:
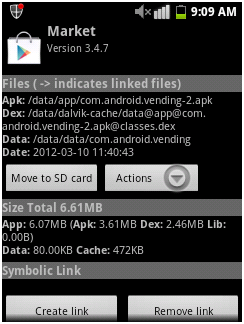
- Users will now be able to the see and use the partitions. They can make more partitions by using the process stated above.
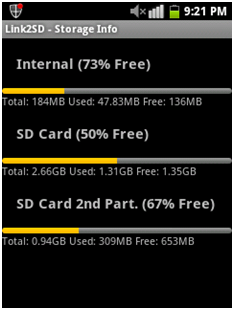
Part 2 How to Recover Data from Android SD Card after Partitioning
In case all the data has been lost from the SD card,Wondershare data recovery can be used to recover it. This state of the art program can recover any data that has been lost.
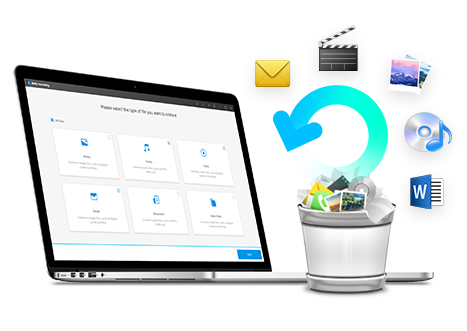
- Recover lost or deleted files, photos, audio, music, emails from any storage device effectively, safely and completely.
- Supports data recovery from recycle bin, hard drive, memory card, flash drive, digital camera and camcorders.
- Supports to recover data for sudden deletion, formatting, hard drive corruption, virus attack, system crash under different situations.
- Preview before recovery allows you to make a selective recovery.
- Supported OS: Windows 10/8/7/XP/Vista, Mac OS X (Mac OS X 10.6, 10.7 and 10.8, 10.9, 10.10 Yosemite, 10.10, 10.11 El Capitan, 10.12 Sierra) on iMac, MacBook, Mac Pro etc.
Here are the steps that should be followed to recover the files
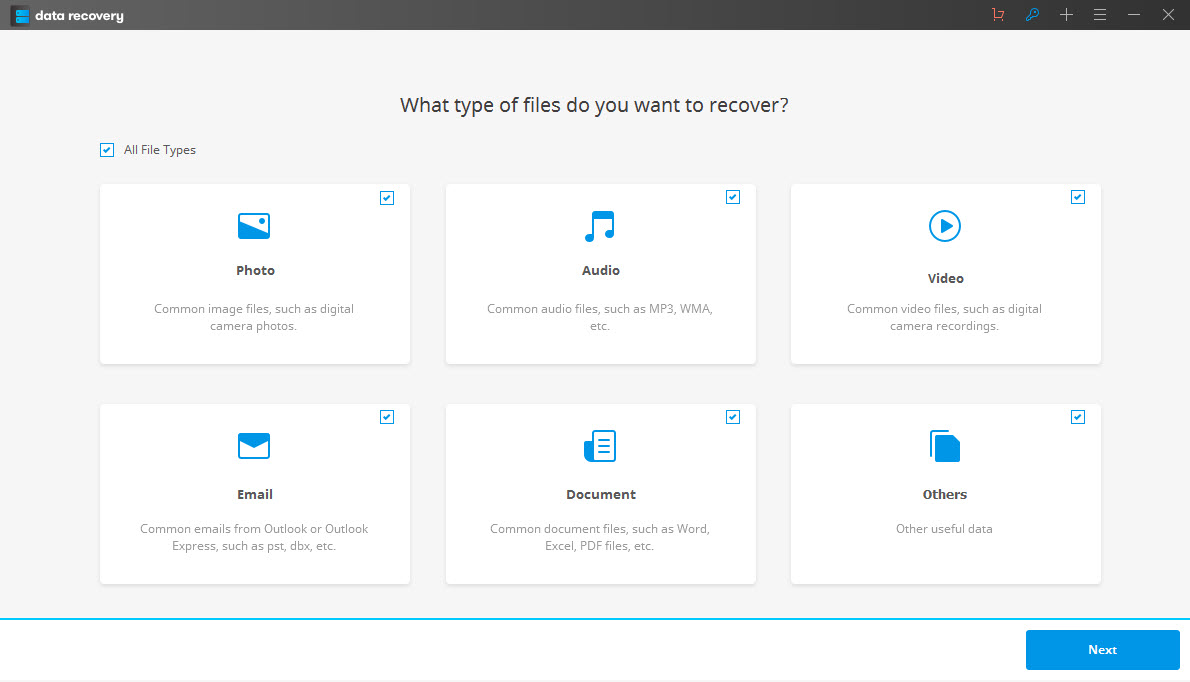
- Launch Wondershare SD Card Recovery software and select the type of files to recover. Click the "All File Types" to start.
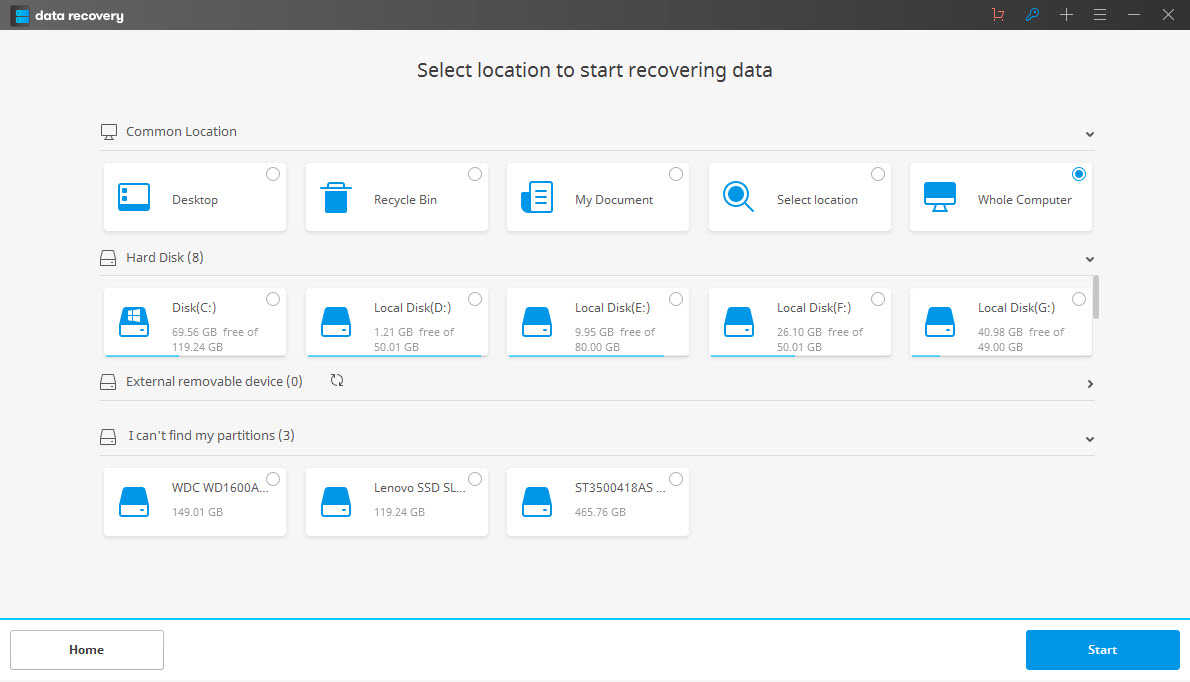
- Next choose the path where the files were lost, in this case, you select the Android SD card on the "External Removed Device" section.
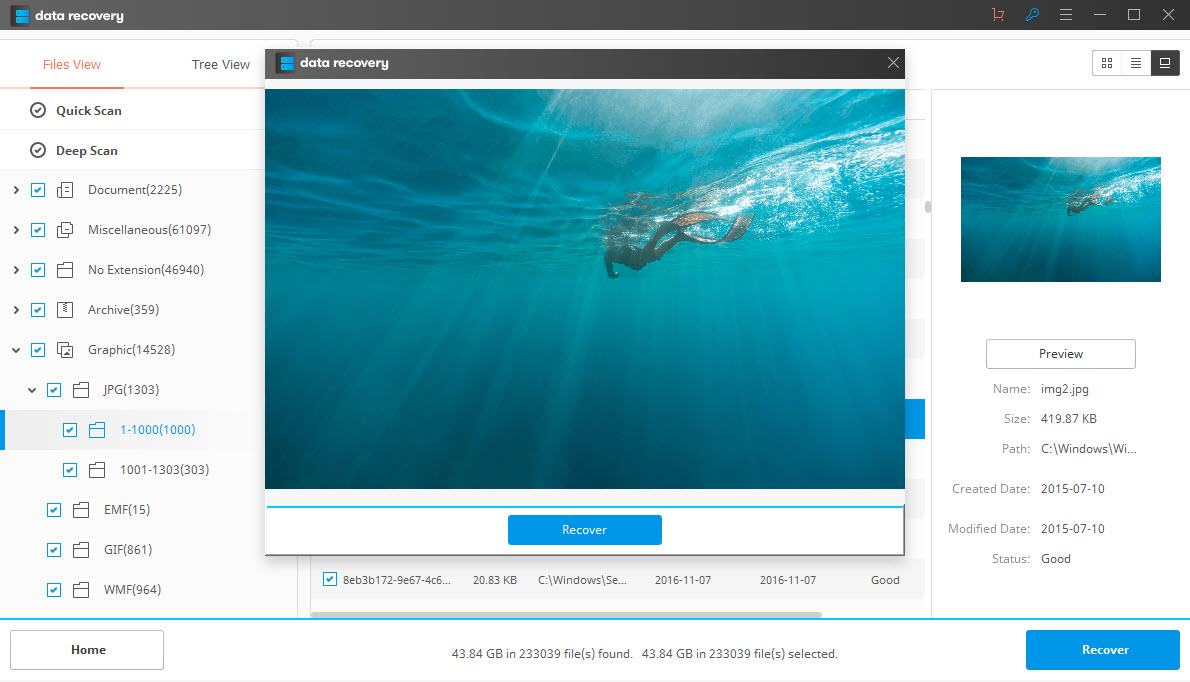
- After the deep scan completed, you can preview the recovered files from android SD card. Click "Recover" to save another storage.
Memory Card Recovery
- Verschillende Memmory Card Recovery +
- Flash Card Recovery +
- Recover Gegevens kaart +
- Sandisk Card Recovery +
- Phone Card Memory Recovery +
- Memory Card Probleem +
-
- Recover verwijderde bestanden vanaf een geheugenkaart
- Memory Card Recovery op Windows / Mac
- Recover verwijderde bestanden van SD-kaart
- Recover geformatteerde SD-kaart
- Online SD Card Recovery
- Recover SD-kaart op Windows / Mac
- Mac Memory Card Photo Recovery
- Bestanden herstellen van MMC
- Partitioning SD Card Recovery
- Fix Memory Card Error +
- Beschadigde / beschadigd Memory Card +
- Foto's / video's herstel +
- Card Recovery Software +
-
- Sim Card Recovery Software
- Top 10 Memory Card Recovery Software
- Card Recovery Solutions
- Beste Memory Card Recovery Software
- Card Recovery VS Wondershare Data Recovery
- 7 Data Recovery VS Wondershare Data Recovery
- Top 5 SD Card Recovery Software
- Memory Card Recovery Gereedschap Online
- Top 5 SD Card Recovery Software Online


