- The first thing: Check Trash on your Mavericks computer
- The second thing: Keep your computer original
- The third thing: recover trash in Mavericks as soon as possible
Almost all of computer users must have encountered this: accidentally deleted a photo or a document when you wanted to drag it or send it to somewhere else. That's kind of misoperation happens almost every hour. What you do when you're unfortunately suffering it? Cry for the loss of the photo, or begin to recreate a new document? Actually, that's not the right thing to do in the first time. Then what is it? Read on.
1 The first thing: Check Trash on your Mavericks computer
Usually, if you didn't delete things with Command + Delete, the deleted files will be recycled into the Trash on your Mac. So the first thing you need to do is checking the Trash. If you find the file there, just drag it to the desktop directly. Then your deleted file is back. What if the file is not there? Because you emptied the Trash or just deleted it by Command + Delete? Move forward to the next things you can do.
2 The second thing: Keep your computer original
In this case, you can't simply find the deleted file from the Trash. What you need to do is keeping your computer original. That's to say, don't create new data on your Mac or add new data to it. Why? Deleted files are not gone immediately. They just become invisible and the space that they occupied is marked as being available for reuse by the system. Therefore, when you put new data on your computer, it may take the reusable space and overwrite the deleted files. Once overwritten, the deleted files can't be recovered in any way. In order to get a better chance of recovering your data, you need to pay attention to this. Then, it's the time to find a way to perform a Mavericks trash recovery now.
3 The third thing: recover trash in Mavericks as soon as possible
To perfrom Mavericks Tash recovery, you need to find a Mavericks data recovery tool first. Here is my recommendation for you: Wondershare Data Recovery for Mac, which allows you to recover all data from the Trash, as long as they are not overwritten. Also, it's user friendly. People with any level of computer skills can use it alone. It only takes you three steps in the whole process. Download the trial version below for free to have a try now.

- Recover lost or deleted files, photos, audio, music, emails from any storage device effectively, safely and completely.
- Supports data recovery from recycle bin, hard drive, memory card, flash drive, digital camera and camcorders.
- Supports to recover data for sudden deletion, formatting, hard drive corruption, virus attack, system crash under different situations.
- Preview before recovery allows you to make a selective recovery.
- Supported OS: Windows 10/8/7/XP/Vista, Mac OS X (Mac OS X 10.6, 10.7 and 10.8, 10.9, 10.10 Yosemite, 10.10, 10.11 El Capitan, 10.12 Sierra) on iMac, MacBook, Mac Pro etc.
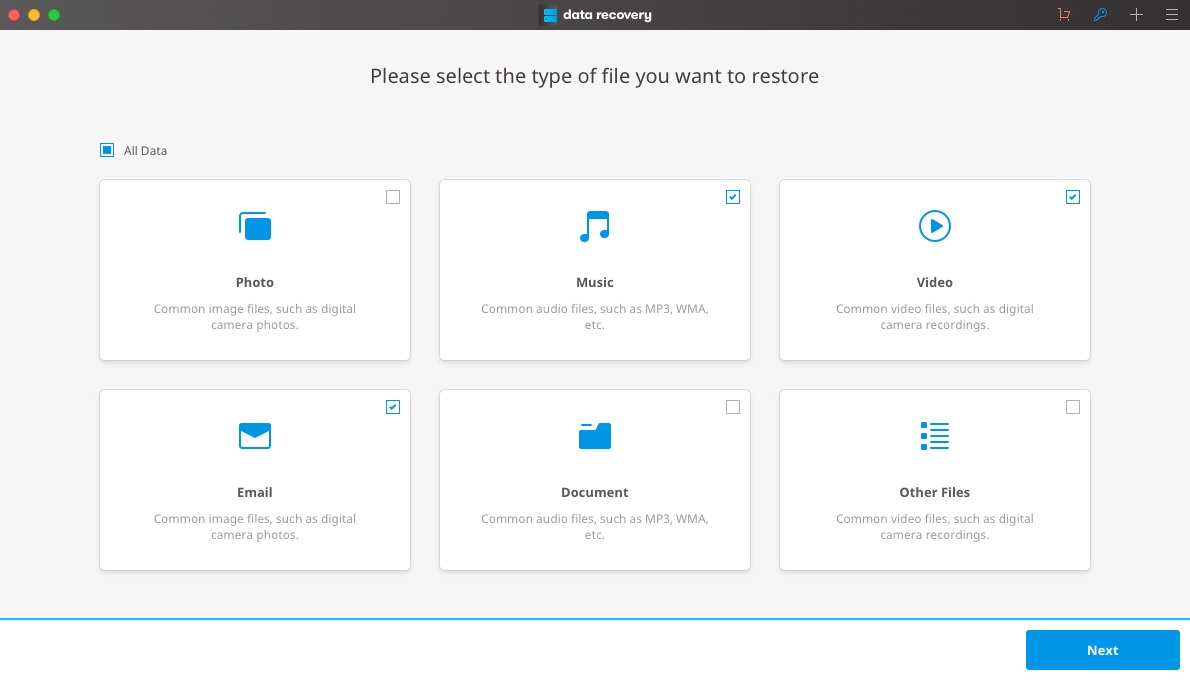
Step 1. Choose the File Type
To recover trash in Mavericks, go to select the option "All File Types" to start.

Step 2. Scan the drive where the Trash locates
After choosing the recovery mode, you'll see all logical drives and external storage devices connected to the Mac displaying by the software. Choose the one where the Trash locates and click on the Start button on the top of the window to begin finding your deleted files.

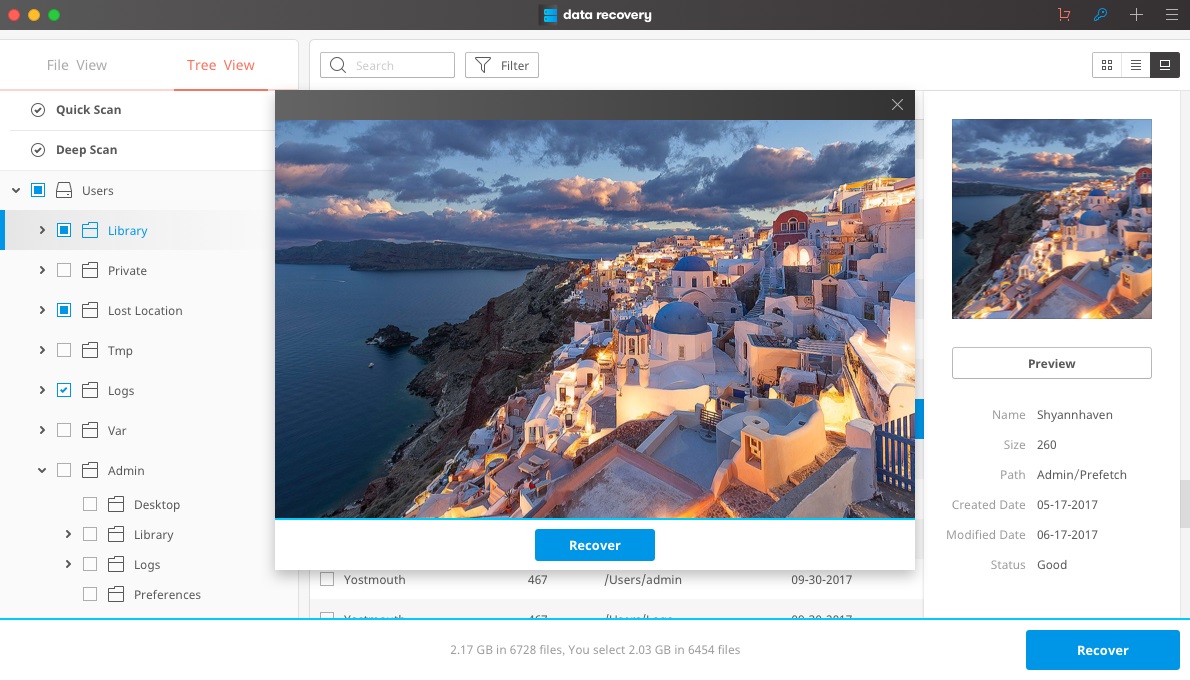
Step 3. Preview and recover trash data in Mavericks
When the software finished the scan, you'll get a scan result as follows. Choose the folder of Trash, and you can preview all recoverable files in it. Tick the items that you want and click on the Recover button on the top to save them on your computer.


