NTFS (New Technology File System) is the file system used for depositing and recovering files on a hard disk. If you want to write a Boot Camp partition on your Mac system you should use exFAT since the Mac’s operating system is already wired to read that.
Part 1: Free ways to Write to NTFS Drives on a Mac
Mac can read but not write to NTFS drives on a Mac, however there are solutions
1. Third party drivers (FREE): although this method requires some involving activity you can get it to work.
- Download and install osxfuse
-

- If you don’t have homebrew yet you will download and install it next
- Install command line tools. Go to applications and navigate to utilities from there. Run the command ‘xcode-select –install’. You will see a pop up with the option to install. Choose install
-

Open a terminal window and enter the command ‘brew install homebrew/fuse/ntfs -3g’

- After this you will move on to disable system integrity protection.
- Once system integrity protection is disabled you should reboot your Mac. As the system begins to reboot, press and hold command+R. the system will enter a recovery mode.
- While in recovery mode, open a terminal from utilities and enter the command ‘csrutil disable’
-

- After that command you will now reboot your system in the usual way to take it out of recovery mode.
- Once fully operational, open a terminal and run these commands ‘sudo mv / sbin/mount_ntfs / sbin/mount_ntfs.original’ and ‘ sudo 1n –s /usr/local/sbin/mount_ntfs /sbin/mount_ntfs’
-

- Enable system integrity protection. After this repeat the same process to press and hold command+R while rebooting the system to enter recovery mode.
- Enter the code ‘csrutil enable’
- Reboot your Mac to normal mode and you should be able to write to NTFS drives on a Mac now
If you ever wish to reverse the entire process the you would need to disable system integrity protection ad run these commands right after ‘sudo rm /sbin/mount_ntfs’ and ‘sudo mv /sbin/mount_ntfs.original /sbin/mount_ntfs’ and ‘brew uninstall ntsf-3g’
You can uninstall osxfuse form the system and remove it completely for system panel. Enable system integrity protection after the uninstall.
2. Apple’s experimental NTFS writing support: the operating system of Mac has experimental support for writing NTFS but this is automatically off and has to be turned on by some steps. This method is the least tried and the least stable. It is in no way guaranteed and if it does not work it is not the fault of able or the instructions. It just does not work sometimes. Also if does not work, it could generate issue for you in the future with writing NTFS.
- To make the process easier you should change the drives word label to single word label if it has not been done already
- Open a terminal by going to applications then utilities and open a terminal. Enter the command ‘sudo nano /etc/fstab’
-

- Add the command ‘LABEL=NAME none ntfs rw,auto,nobrowse’ to nano and name the file what you want by replacing NAME. if you want to write more than one ntfs file you can do so by adding a different command for them as the one above
- Press and hold control+O after to save the file or files and control+X to close nano
(If you want to write to multiple NTFS drives that you have, just add a new line for each drives, ) -

If the drive is connected to your Mac, then disconnect it and connect it again. Go to finder, click on go then select go to folder and type ‘/Volumes’.
If this was Windows, you would find your missing USB drive in Windows by now. But Windows writes on NTFS automatically without these steps so it will be easy to find your missing USB in Windows.
Part 2: How to Recover data from NTFS Drive
3. Recover data from NTFS Drive: If your data in NTFS file is lost during any of the above mentioned processes, you can recover it using a hard drive data recovery software. We recommend Wondershare Data Recovery. This data recovery tool will recover data from NTFS drives. If you connect your USB device and you cannot see it you can follow our steps to find your missing USB drive in Windows and follow the simple steps to recover data from NTFS drives.

- Recover lost or deleted files, photos, audio, music, emails from any storage device effectively, safely and completely.
- Supports data recovery from recycle bin, hard drive, memory card, flash drive, digital camera and camcorders.
- Supports to recover data for sudden deletion, formatting, hard drive corruption, virus attack, system crash under different situations.
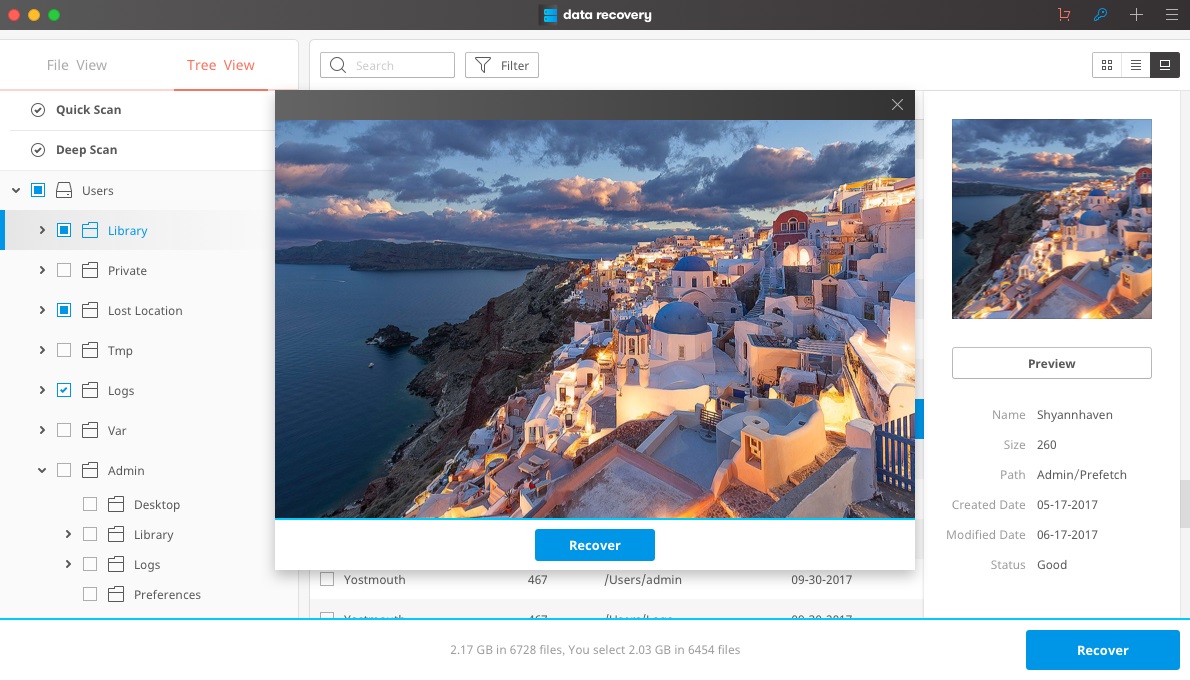
- Preview before recovery allows you to make a selective recovery.
- Supported OS: Windows 10/8/7/XP/Vista, Mac OS X (Mac OS X 10.6, 10.7 and 10.8, 10.9, 10.10 Yosemite, 10.10, 10.11 El Capitan, 10.12 Sierra) on iMac, MacBook, Mac Pro etc.
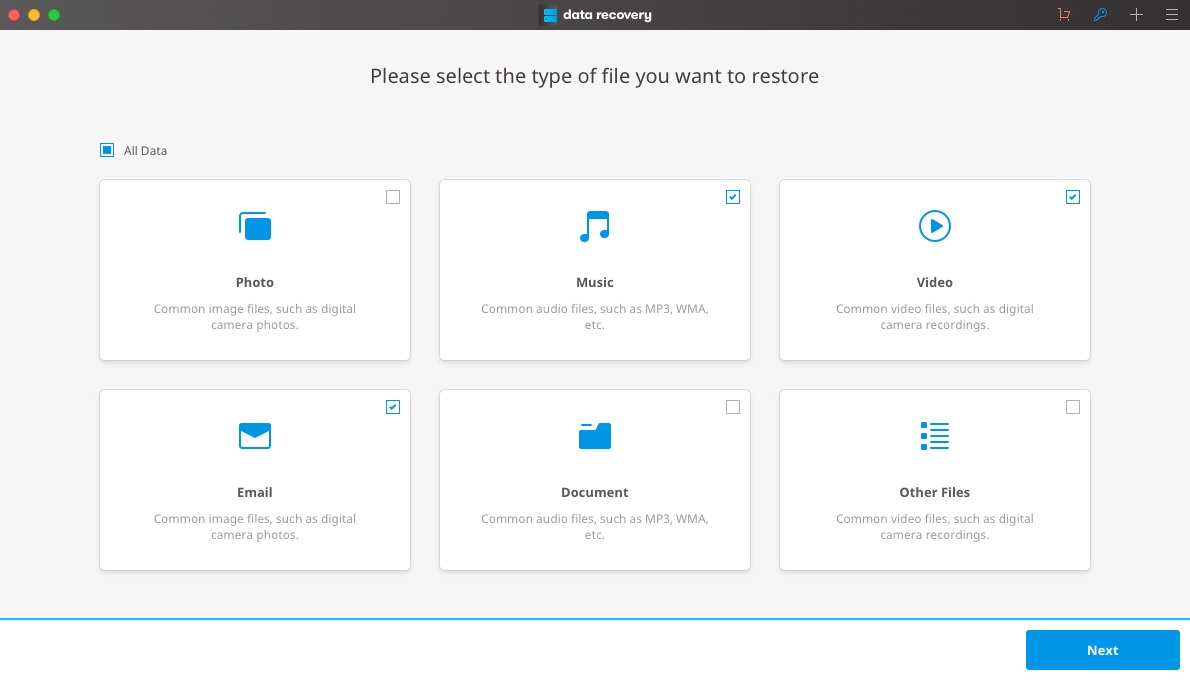
download and launch Wondershare Data Recovery on you Mac, follow the next simple steps to perform Mac hard drive data recovery.
Step 1 Select the file type you want to recover from Mac hard drive.

Step 2 Select you Mac hard drive and click "Start" to scanning lost files.

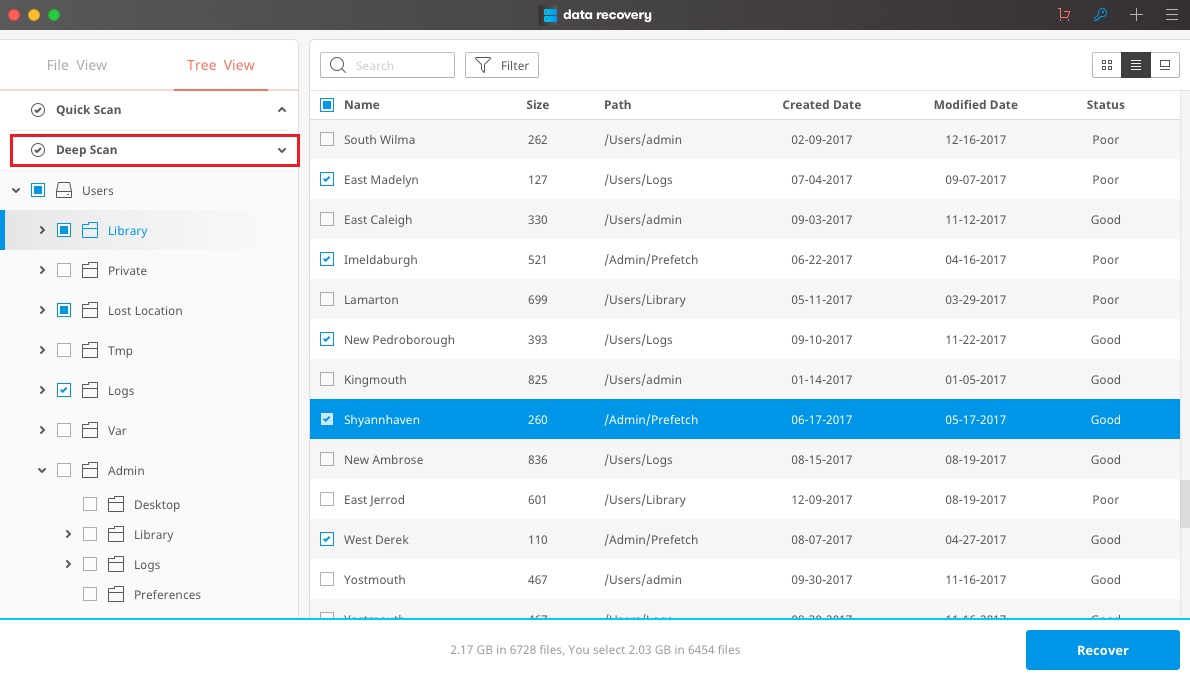
Step 3 It will start a quick scan, if it can't find your lost data you can go to deep scan which will deeply search more file from hard drive.

Step 4 After scanning, you can preview the recovered files to check if your desired files have been located.

A Mac can read NTFS files but cannot write on them. there are ways to change this using some free third party apps that can easily be downloaded, installed and used on a Mac to write NTFS. Apple also has an experimental NTFS write support. You can make use of this for writing NTFS on Mac.


